July 19, 2021
If you’re a digital or graphic artist, try Torn Image Overlap technique in your next digital art design to replicate elements of a handmade collage.
From its first revolutionary iteration circa 1988 to the fully functional editor many of us know and love today, Adobe Photoshop has consistently set the standard for graphic editing and digital art. As such, it is pretty much every creative professional or hobbyist’s dream — providing they know how to use it, of course.
When software has so many features, it can be difficult for beginners to know where to start and for Photoshop pros to know what to try next. Fear not, the wonderful world of Adobe Photoshop tutorials (where inspiration is everywhere) awaits you. In this very spirit, we present the below tutorial with written instructions and screenshots to help you create a torn image overlap in Photoshop.
The technique is relatively simple to reproduce, while the potential outcomes are visually impressive. Combine with a fancy font to drive your message home! Whether you’re looking for general inspiration or you’re specifically interested in creating torn image overlaps, stay tuned for a Photoshop knowledge download!
First, let’s start with some background information and project ideas. Torn image overlaps can add visual interest to most designs, meaning graphic or web designers, illustrators, artists, hobbyists, and other creatives with a digital leaning, can use the technique. That said, it can be quite a bold design choice, so use it sparingly and when it will create the optimum effect.
Torn image overlaps add intrigue to storybook illustrations and can be used to create marketing materials or website backgrounds with an eye-catching twist. If you’re a digital or graphic artist, try the technique in your next art-print to replicate elements of a handmade collage. For hobbyists or general design enthusiasts, have fun and experiment!
The tutorial was produced using Adobe Photoshop CC (2017); thankfully, most Photoshop versions have a similar layout. A Mac was used, but shortcuts for both Mac and Windows users are included within the guide. After you’ve digested the tutorial’s information, consider free stock images to practice the technique if you’re on a budget.
What You Will Need
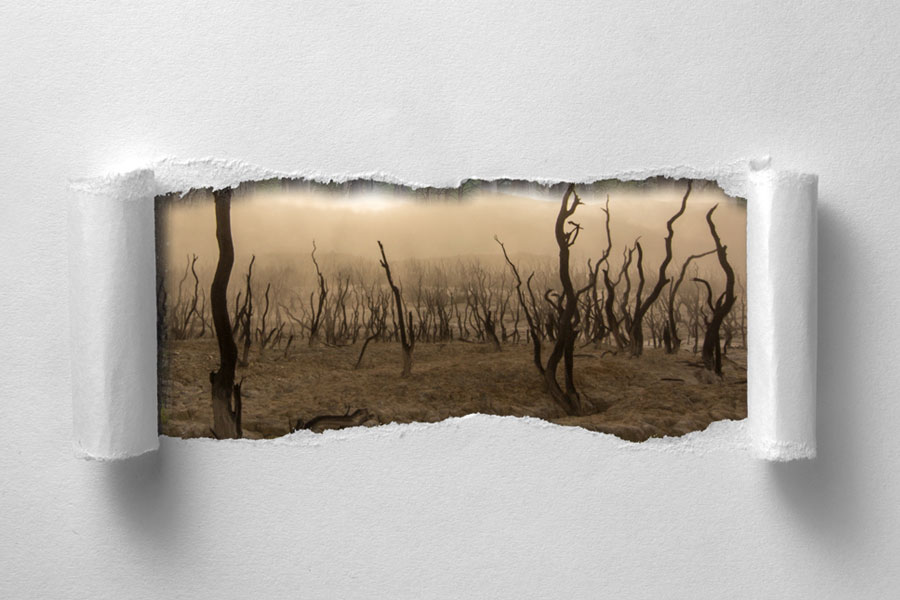
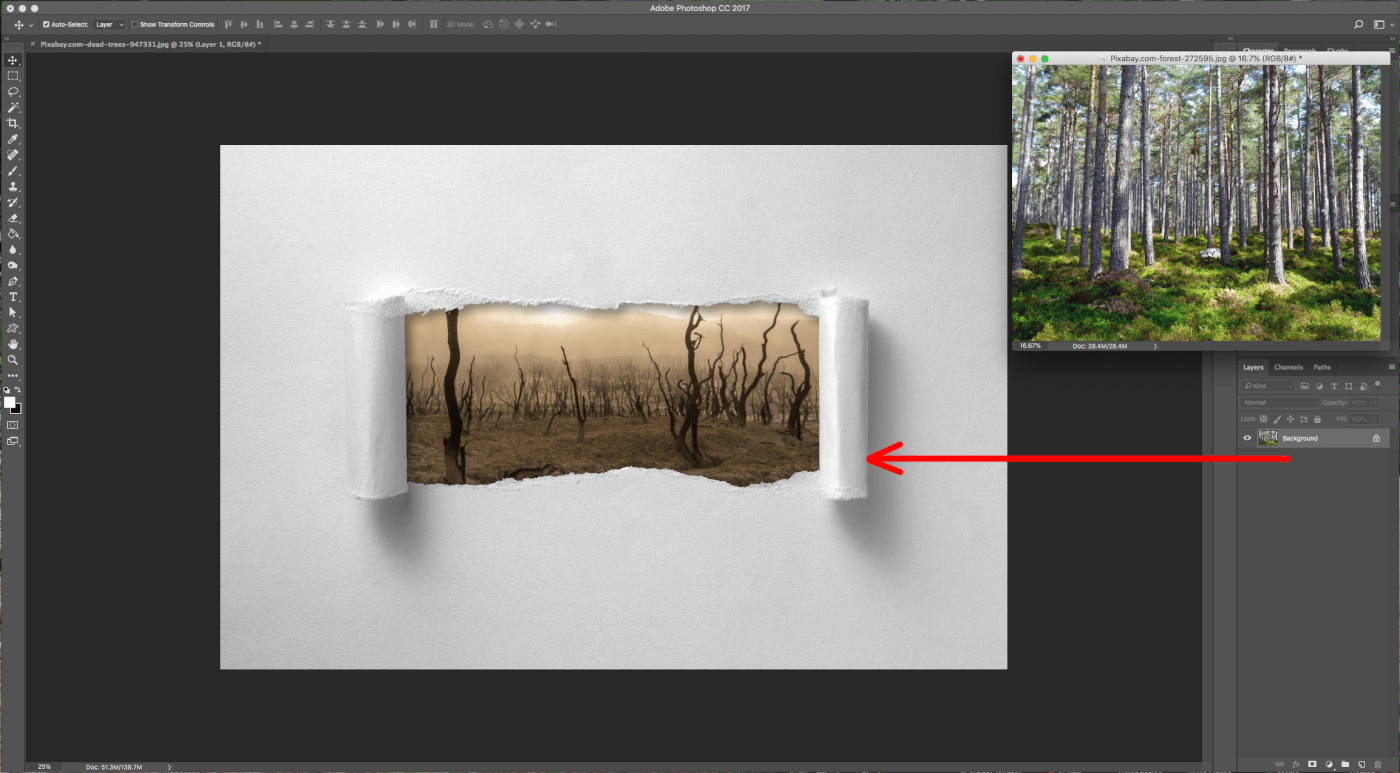
For this tutorial, we need two images. One for the ‘Background’ and the second one will be the ‘Top Image.’ It will almost cover the entire Canvas, except for the ‘Hole.’ You could use the same image twice, but maybe use a black and white filter on one of them to create visual contrast. We will also need a picture of a torn piece of paper to create the effect.
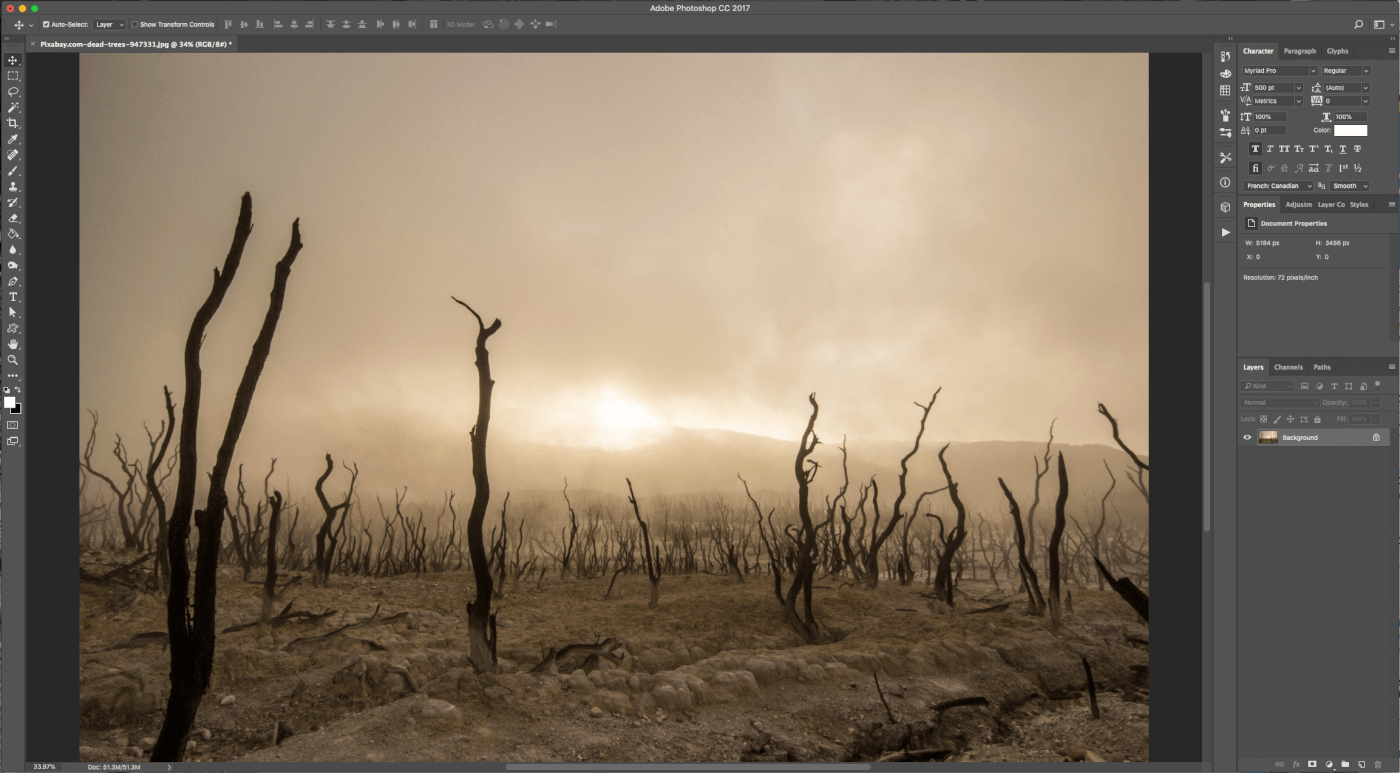
Step 1 - In Photoshop, open the image you chose as your ‘Background.’
Step 2 - Open your ‘Torn Paper’ file and drag it on to your original document.
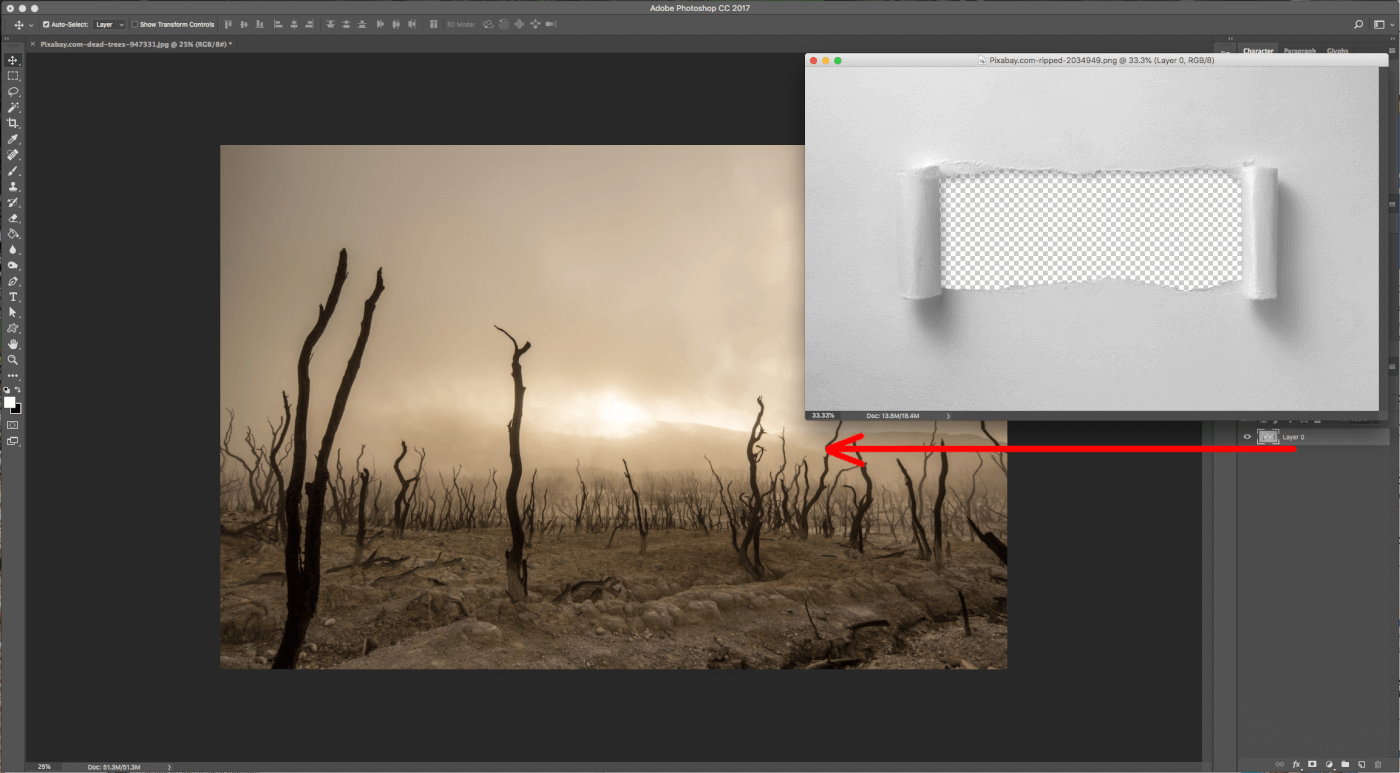
Step 3 - Use ‘Free Transform’ (Command/Control + T) to ‘Rotate’ and ‘Resize’ your image to fit the Canvas.
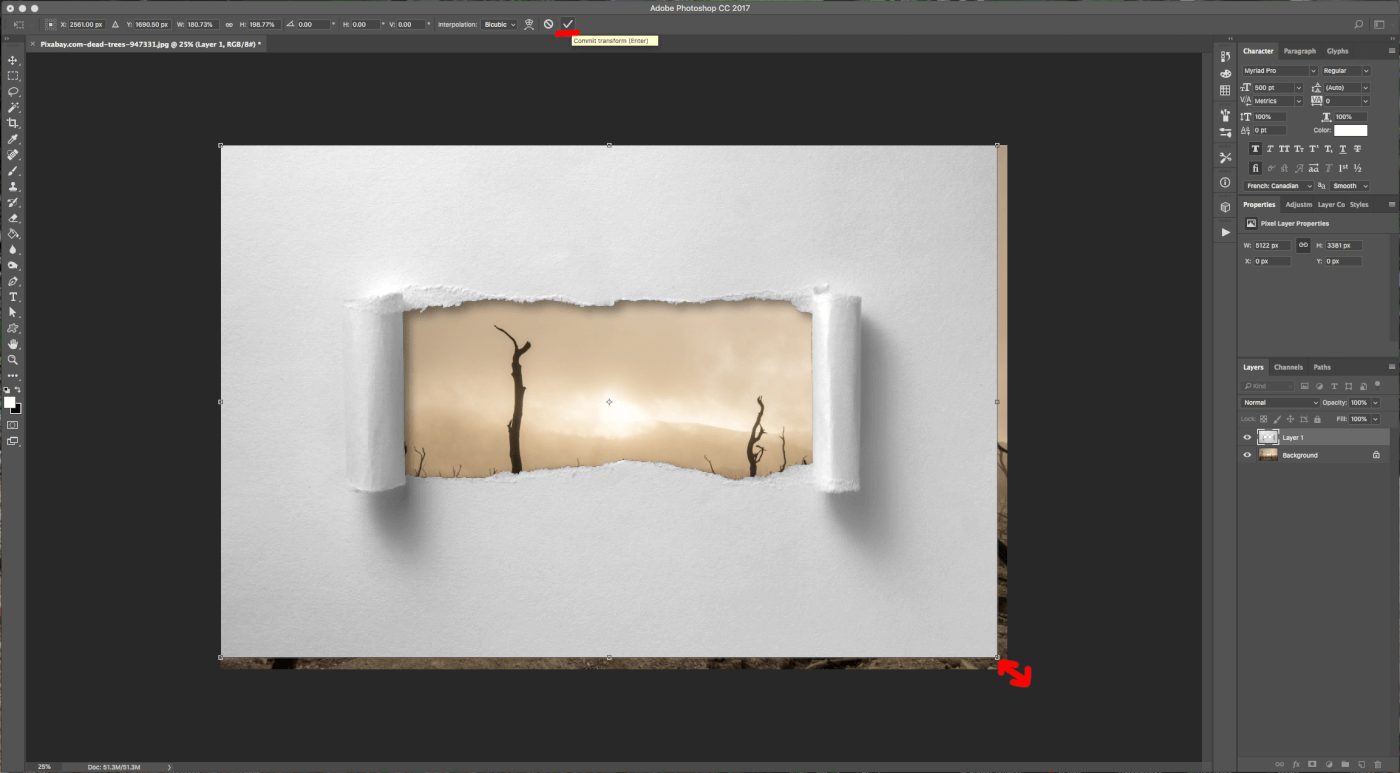
Step 4 - When you have finished, hit ‘Enter’ or click the small ‘Check Mark’ via the top menu.
Step 5 - Double-click on the ‘Background’ layer thumbnail to unlock it and click ‘OK’ on the Pop-Up window.
Step 6 - Move the ‘Background’ layer until the visible portion is the one that works better for your artwork.

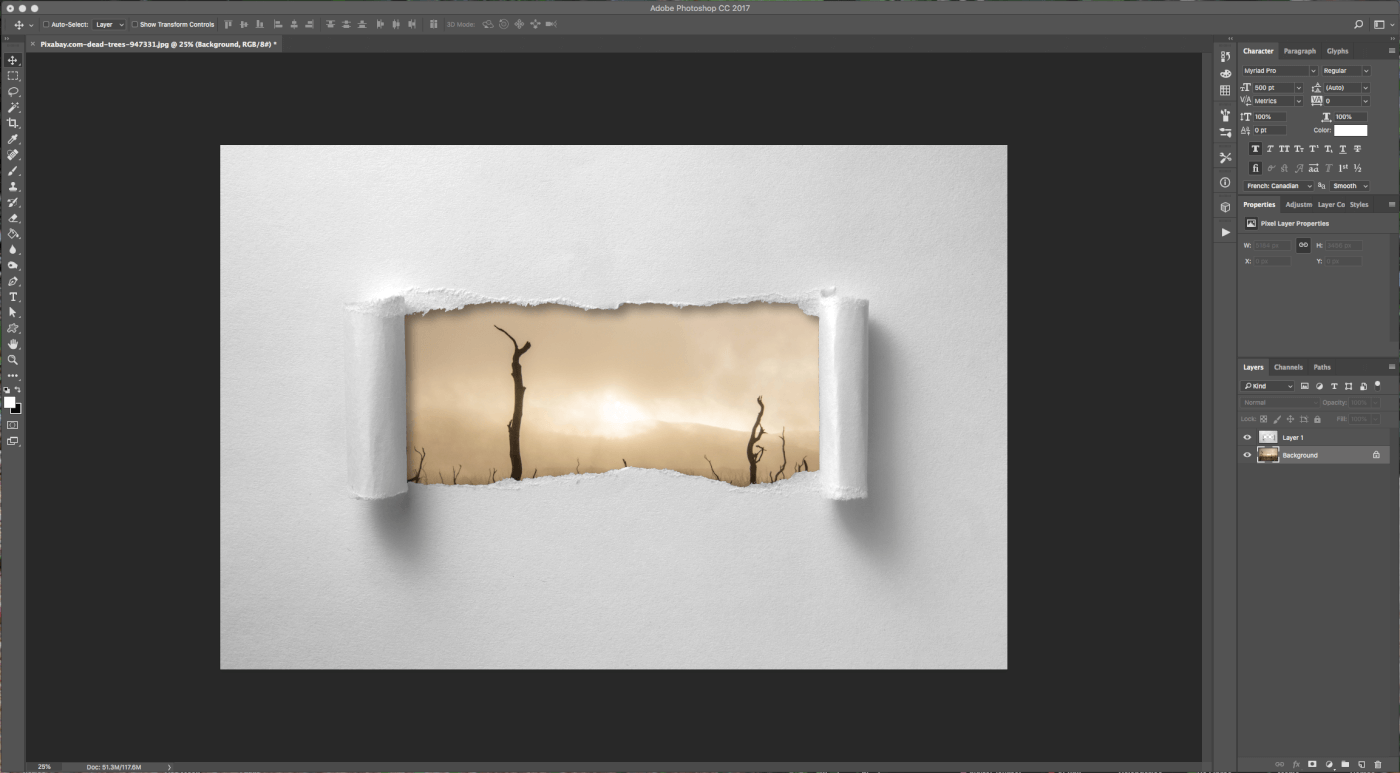
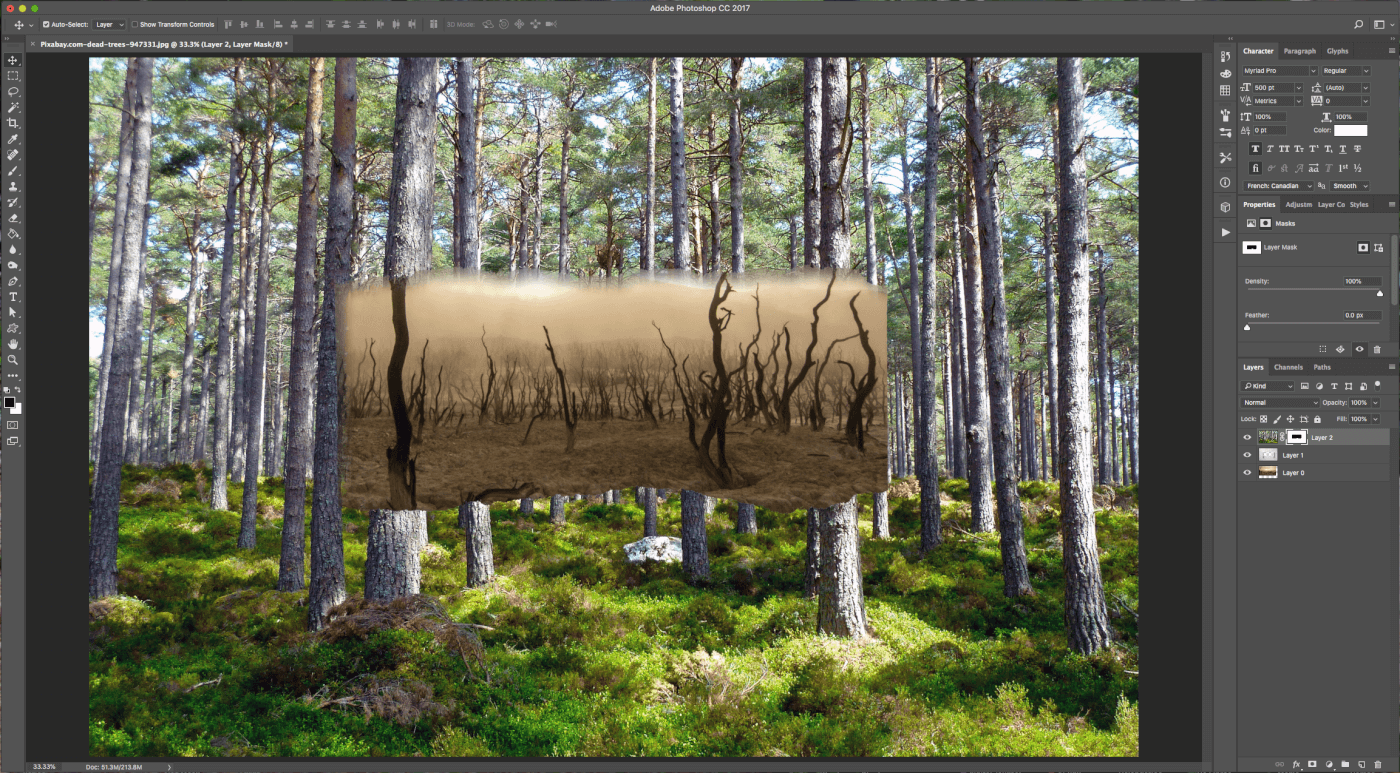
Step 7 - Open your ‘Top Image’ file and drag it on to your original document.
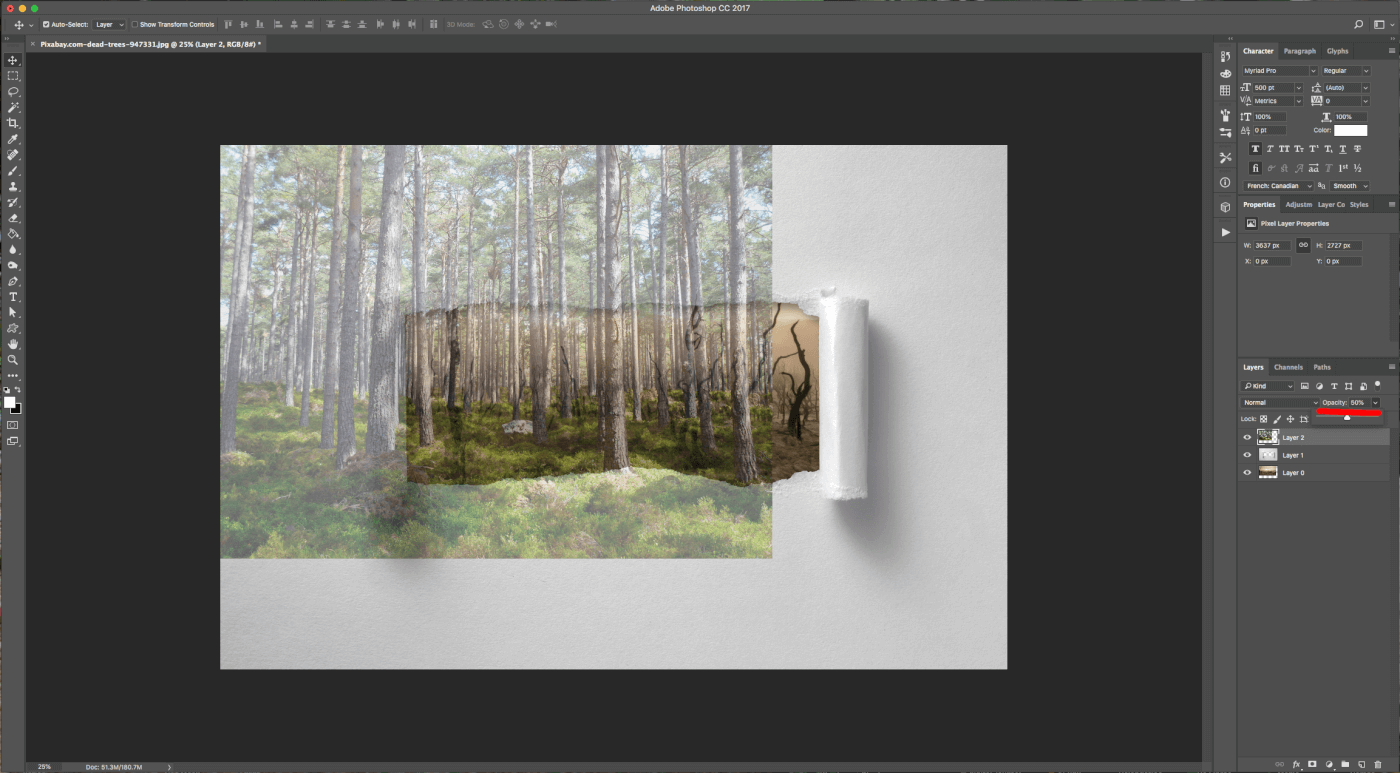
Here’s how your document will look once you’ve dragged the ‘Top Image’ file on to it:

Step 8 - Lower the ‘Opacity’ to 50% to get an accurate view of how the images are working together so far.
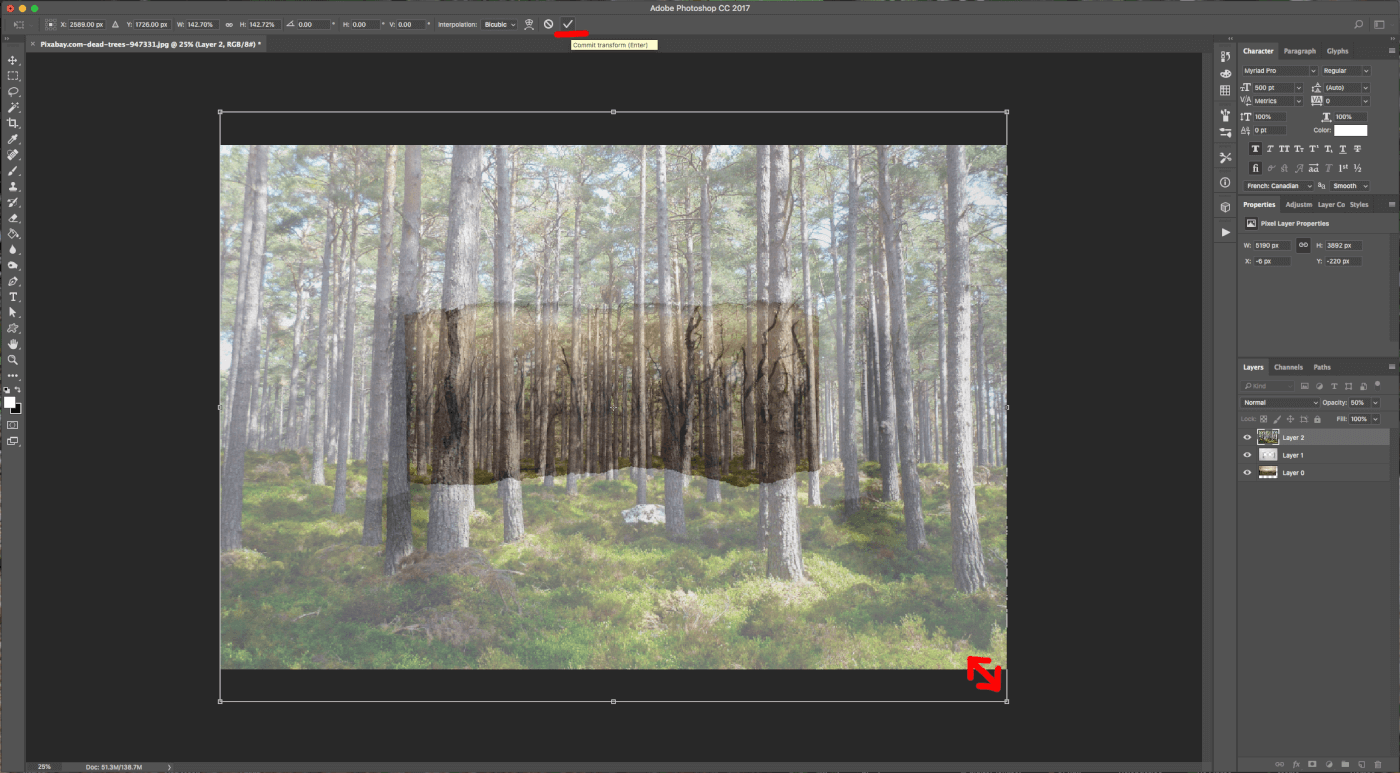
Step 9 - Use ‘Free Transform’ (Command/Control + T) to ‘Rotate’ and ‘Resize’ to fit the Canvas. When you are done, hit Enter or click the small ‘Check Mark’ on the top menu.
Step 10 - Make sure you are still working on your top layer.
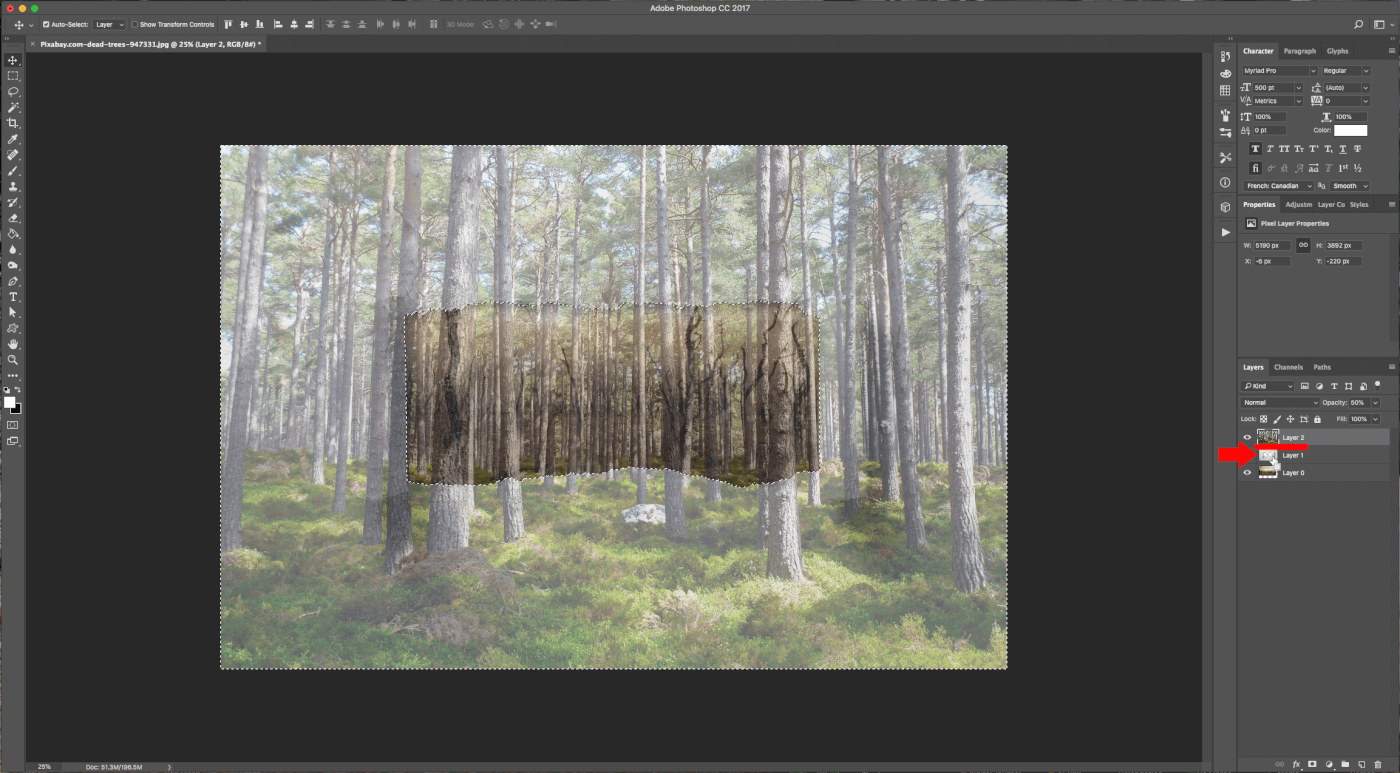
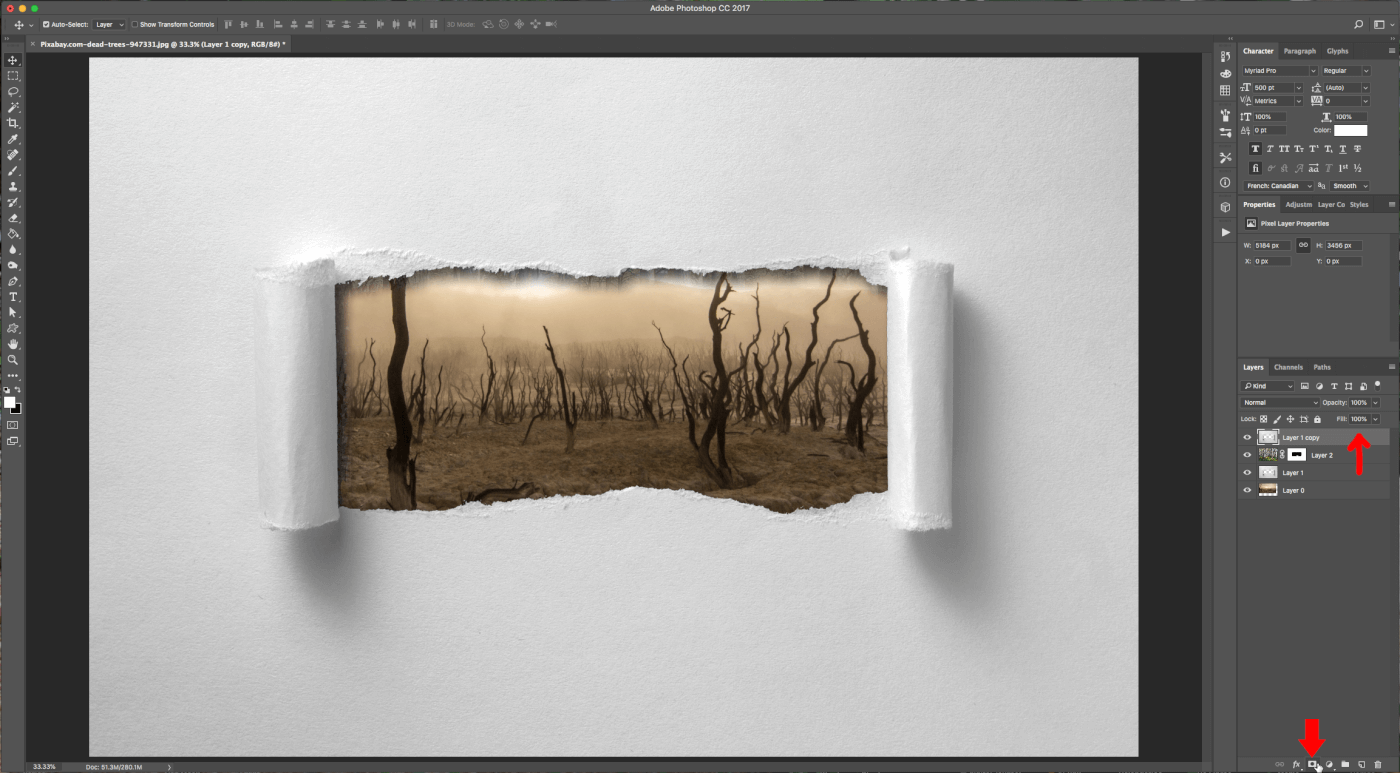
Step 11 - Then ‘Command/Control-Click’ on top of the Torn Paper thumbnail to make a selection and create a ‘Mask’ by clicking on the small button at the bottom of the ‘Layers Panel.’
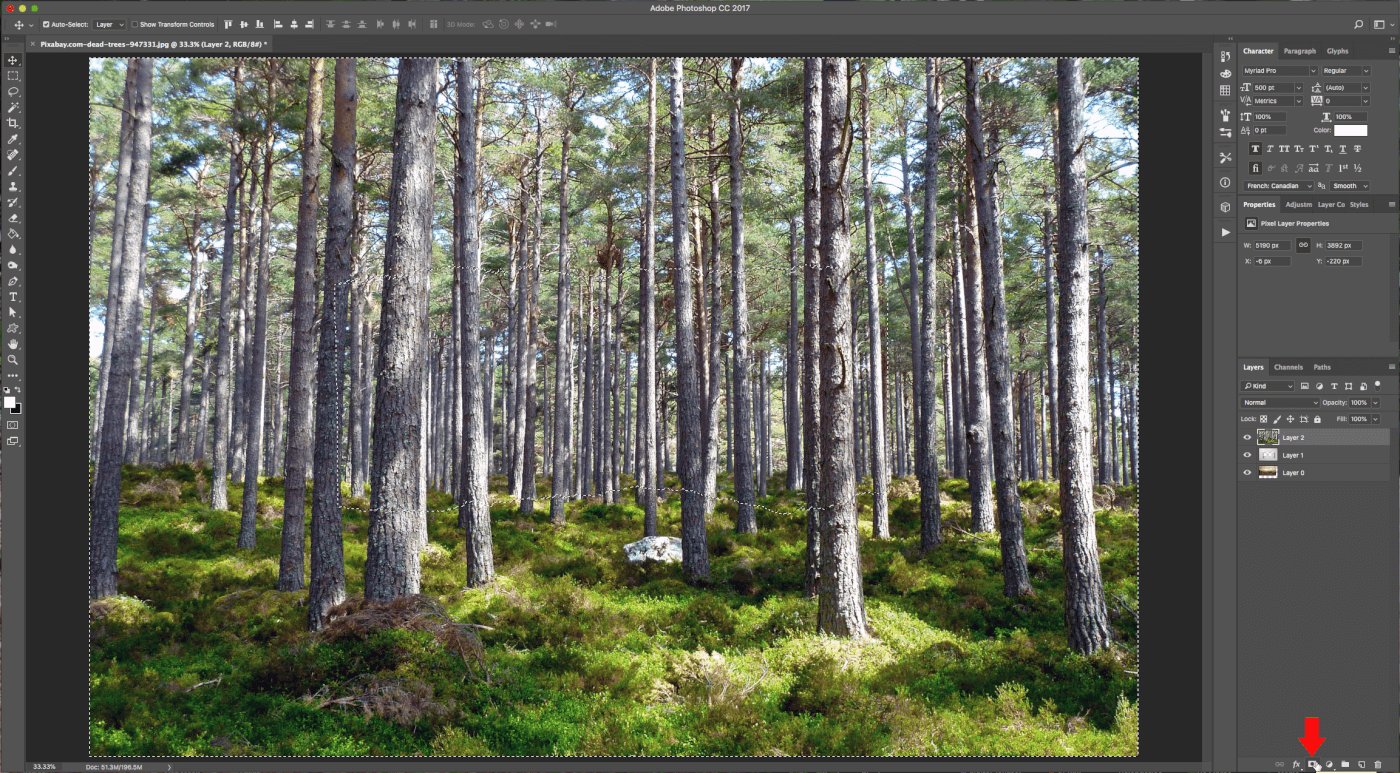
Here is how your design should be looking now you’ve created a ‘Mask’:
Step 12 - Duplicate your Torn Paper layer (Command/Control + J).

Step 13 - Drag the duplicate to the top and create a ‘Layer Mask’ of this layer.
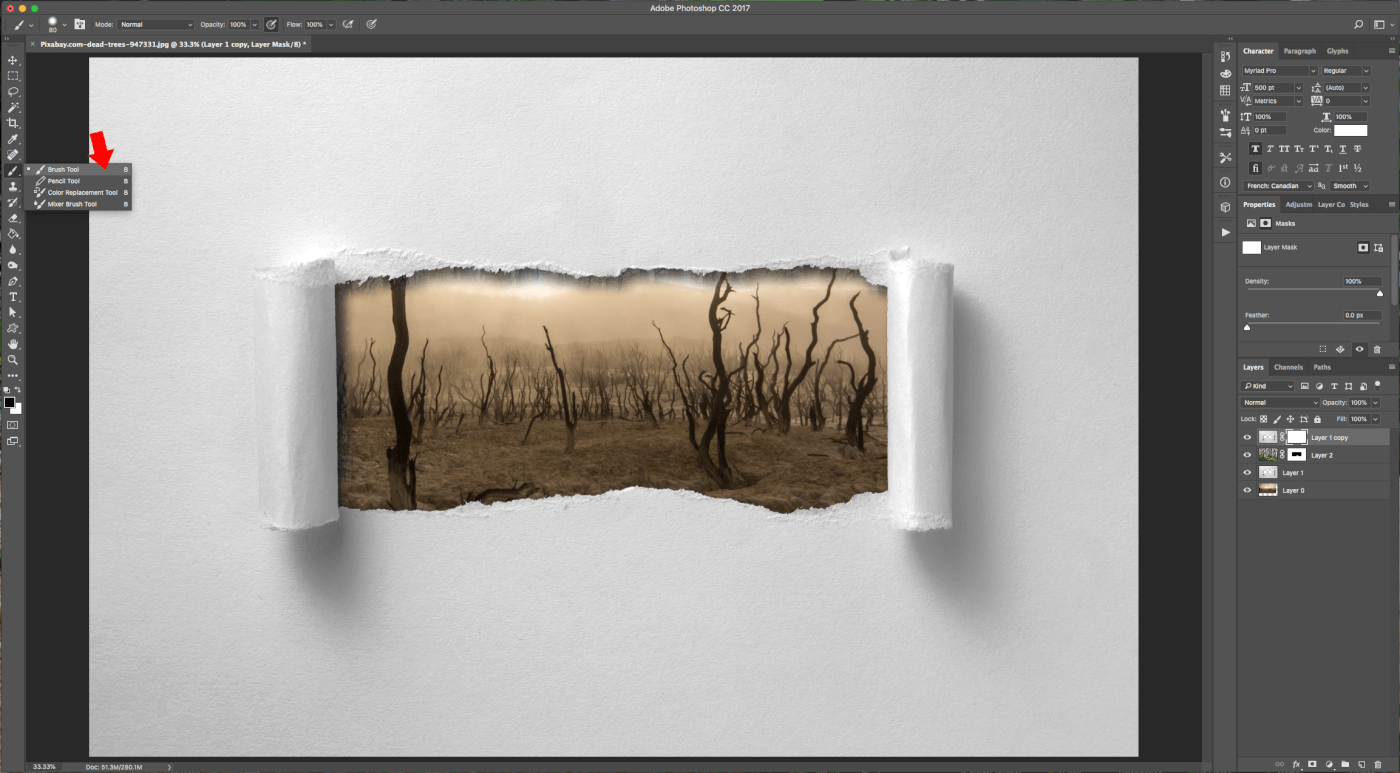
Step 14 - Select the ‘Brush Tool’ (B).
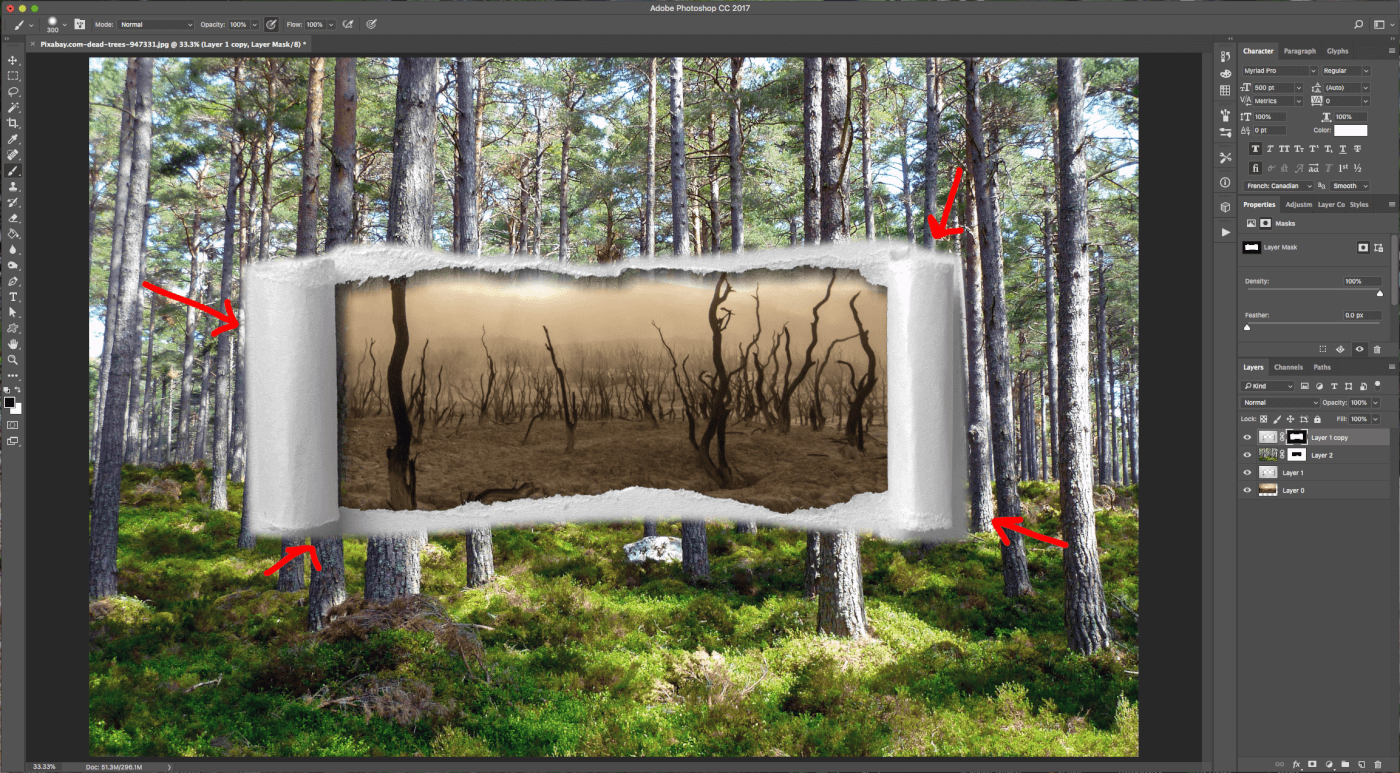
Step 15 - Use a large and medium soft brush (300 px, 50% ‘Hardness’) and Black as ‘Foreground’ color to hide almost all the paper and just leave the hole and the torn edges.
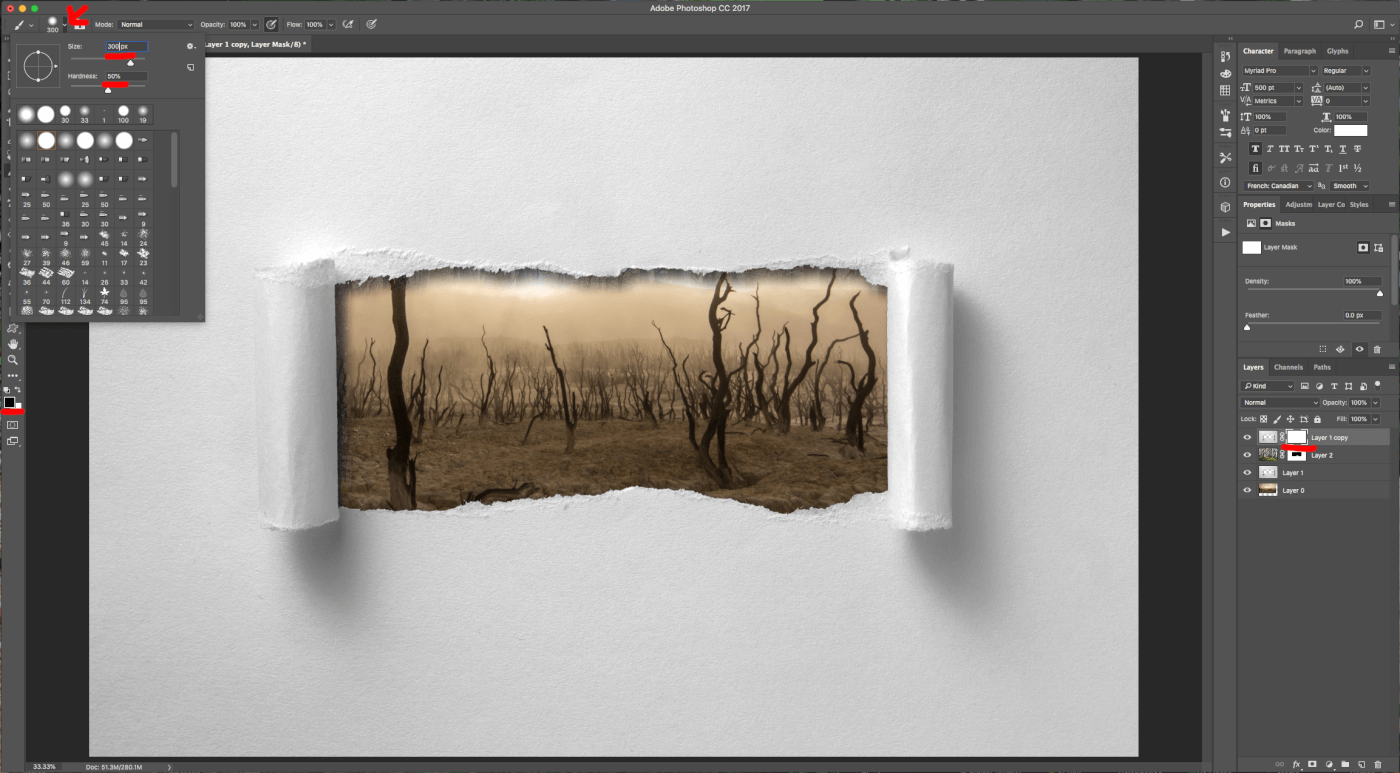
Here is how your design should look after following Steps 14 and 15:
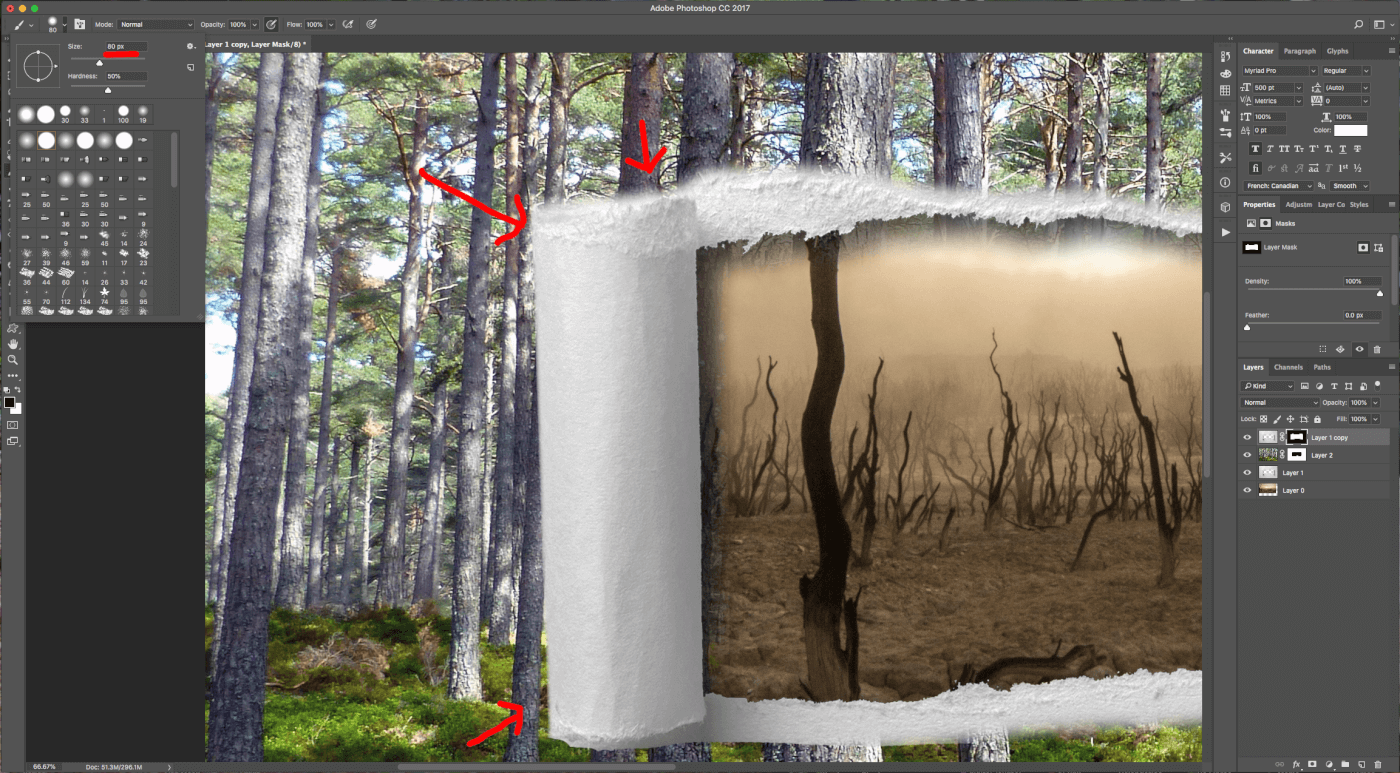
Step 16 - Make the brush a bit smaller (80 px, 50% ‘Hardness’) and clean the hole’s edges, trying not to lose any detail along the way.
Here’s a top tip: You can always bring back something by changing the “Foreground” color to White.
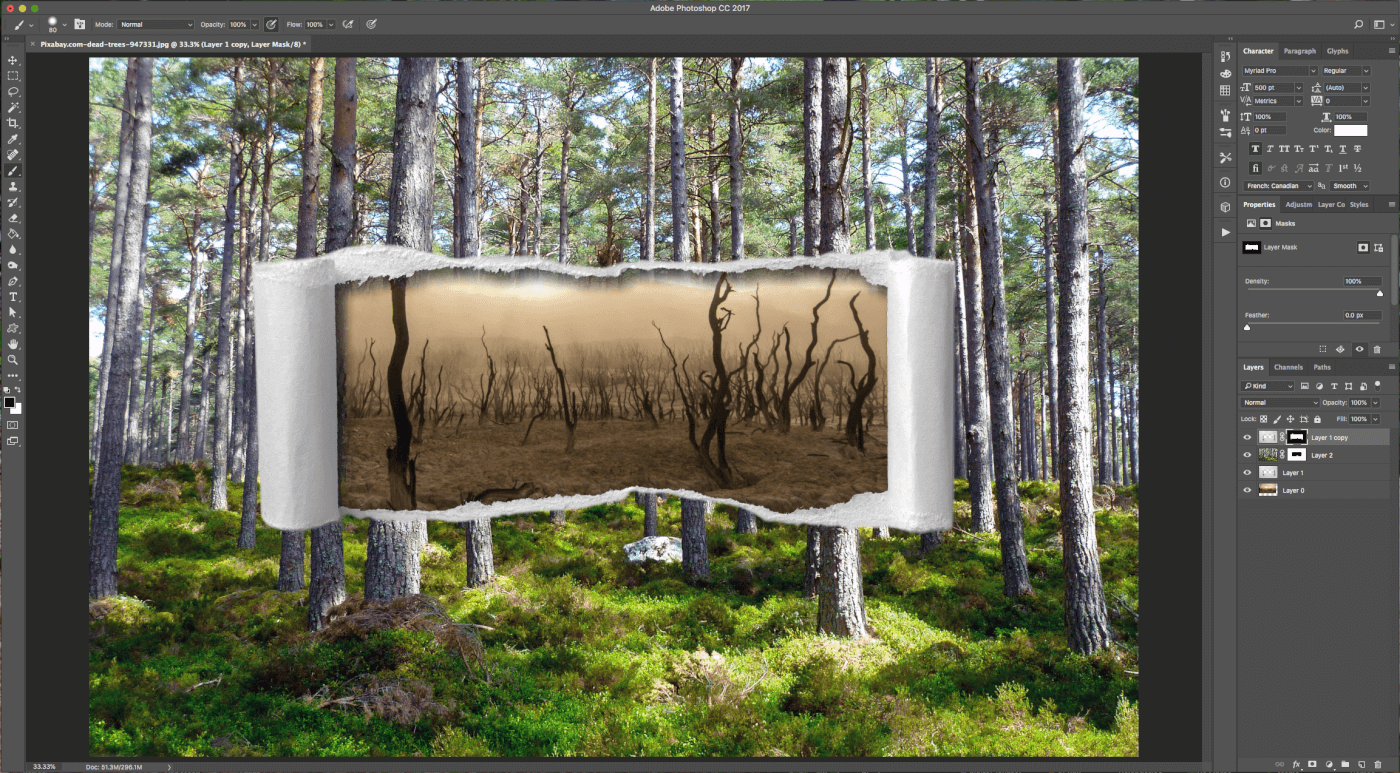
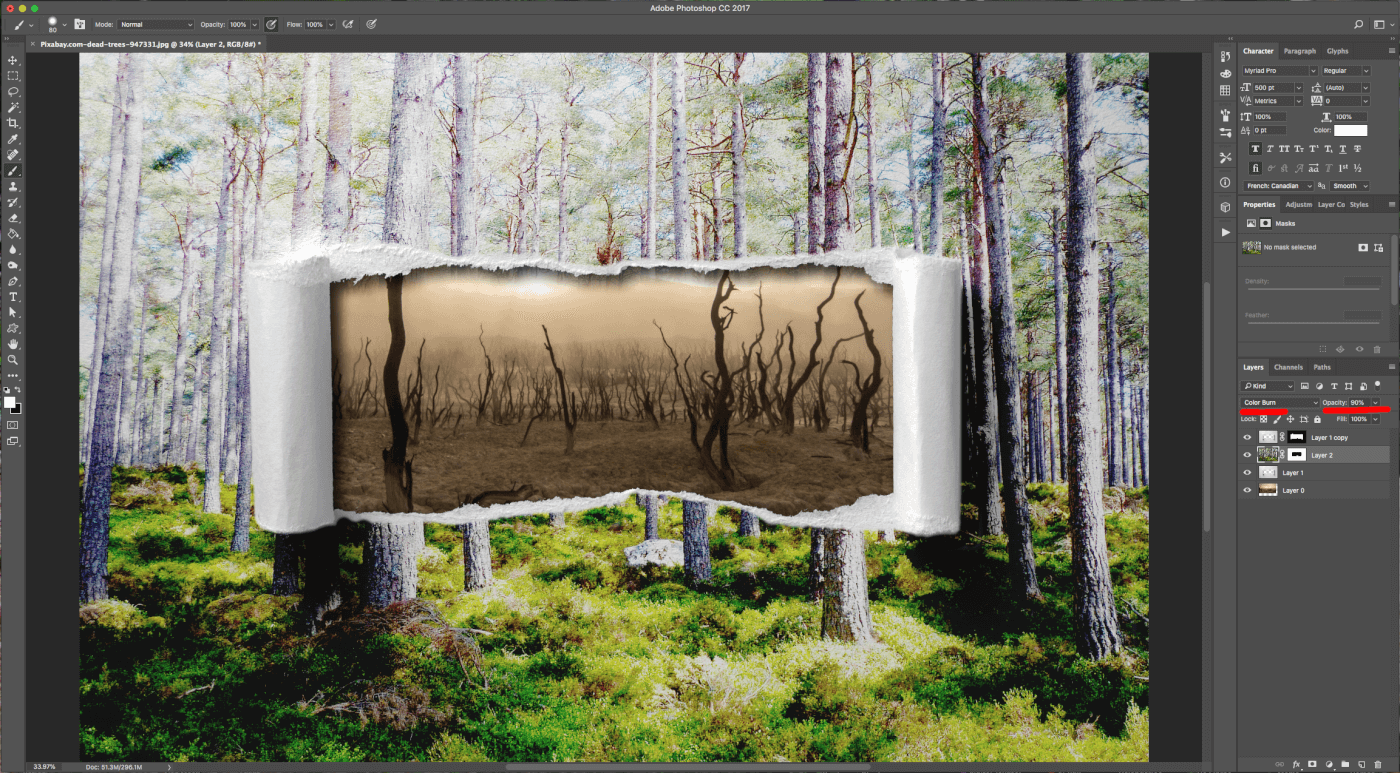
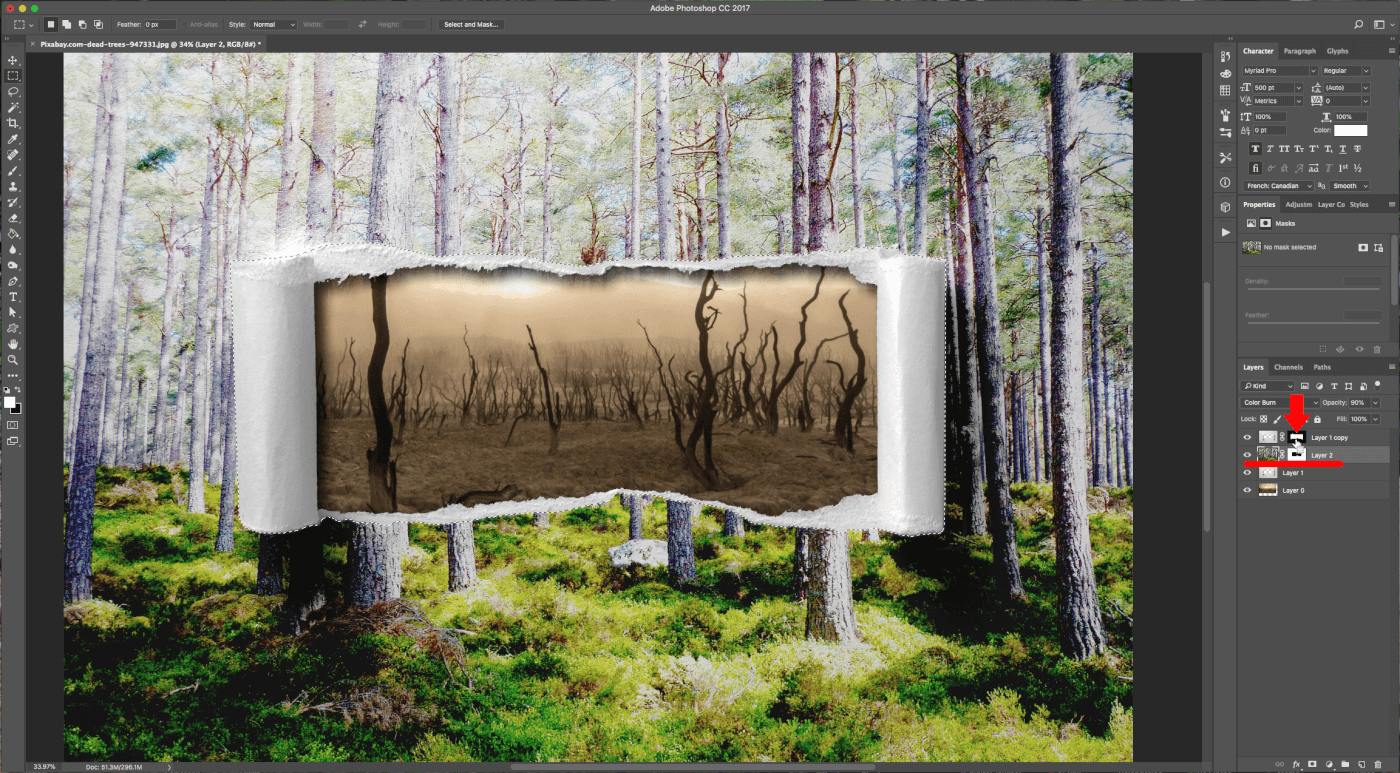
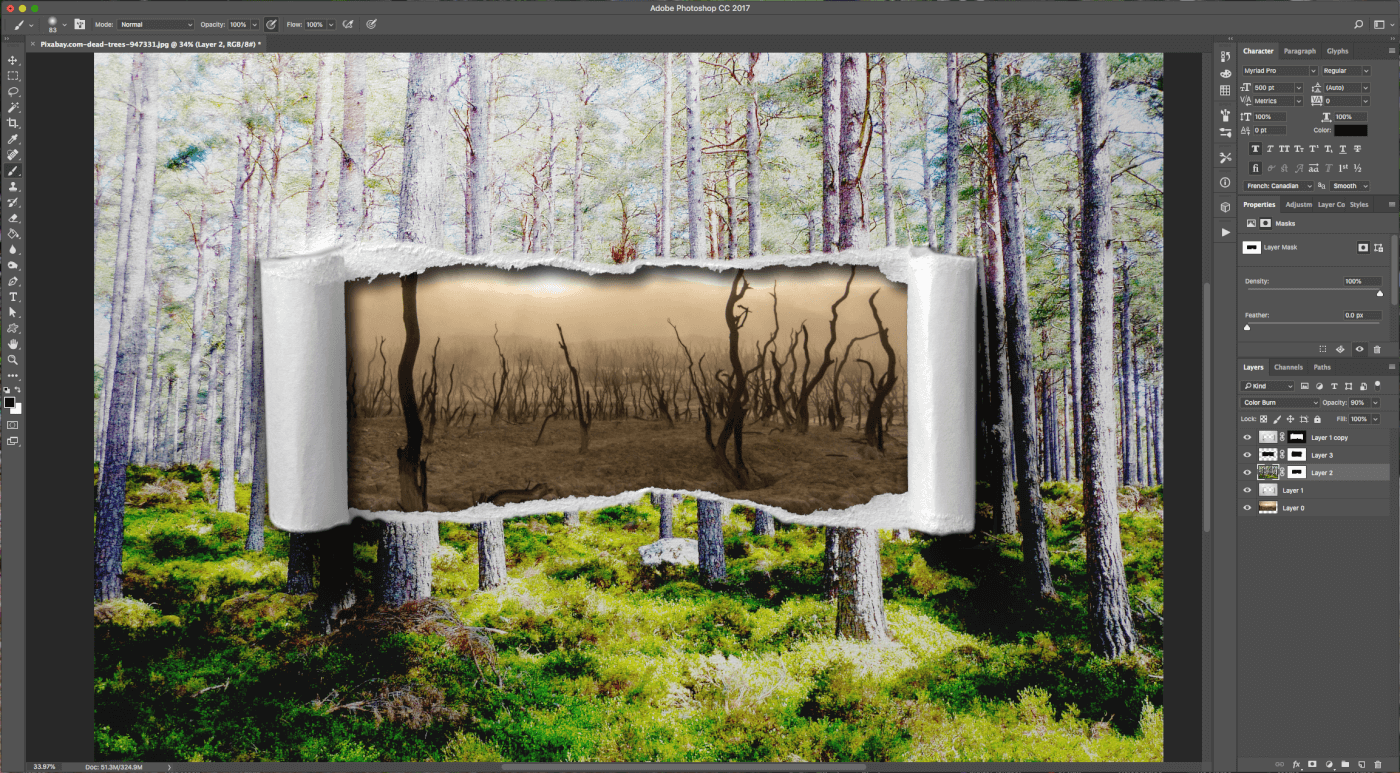
Step 17 - Change the ‘Blending Mode’ to ‘Color Burn’ and the ‘Opacity’ to 90%.
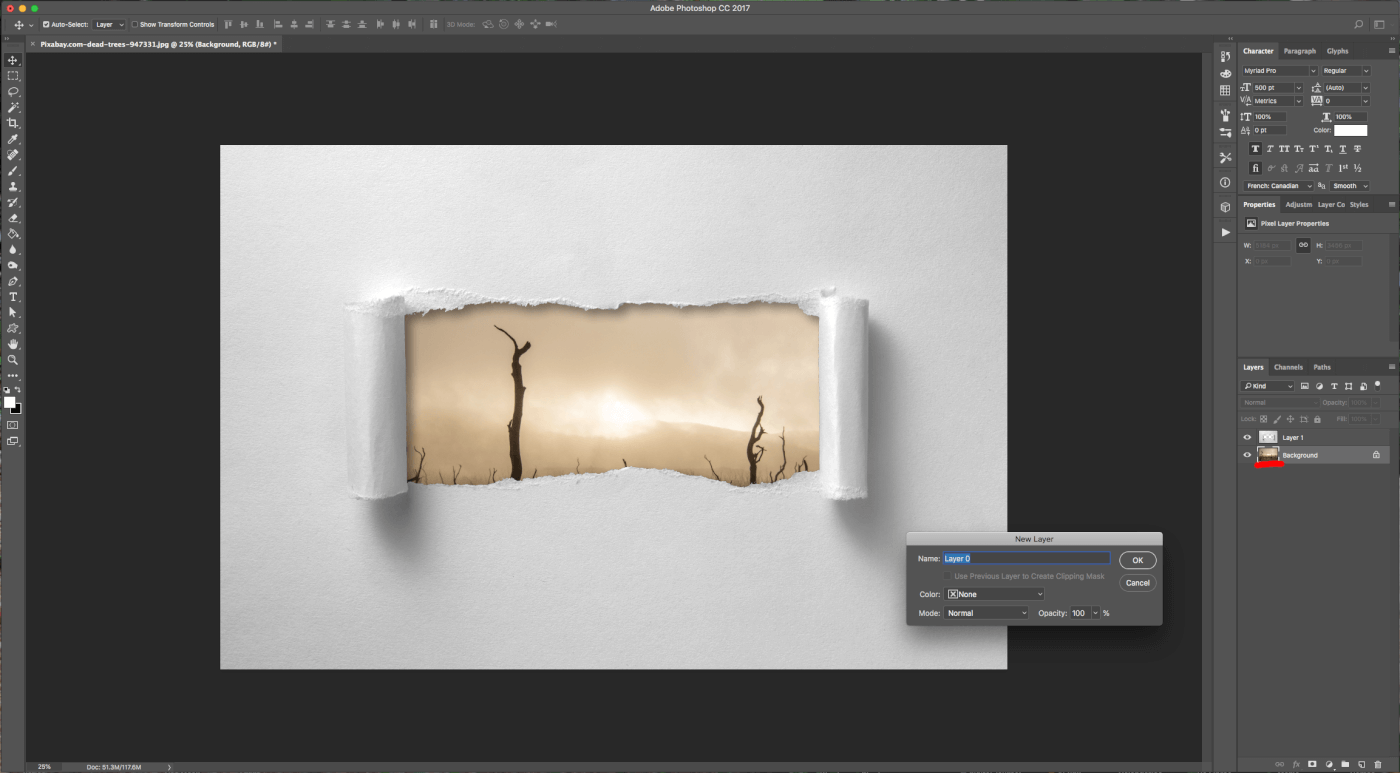
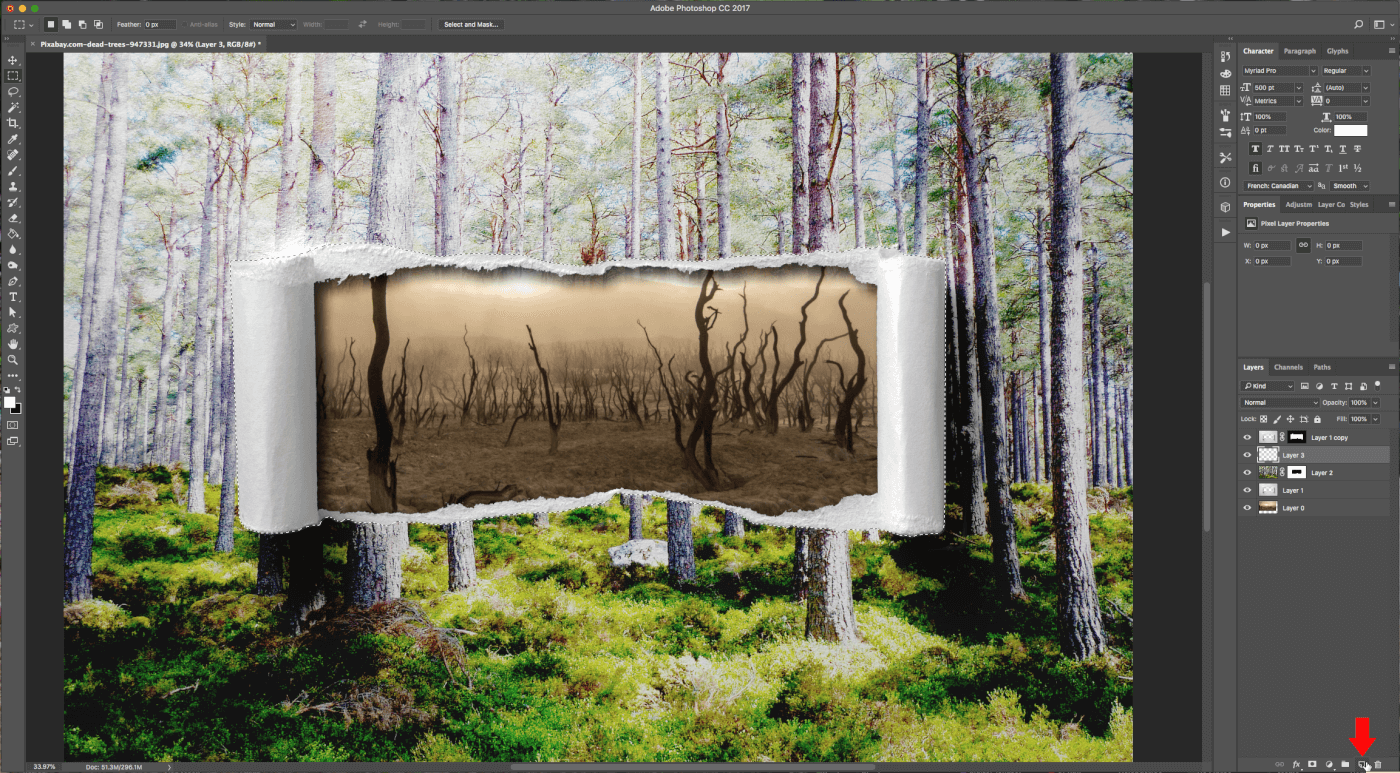
Step 18 - With your ‘Top Image’ layer selected, ‘Command/Control-Click’ on top of the ‘Torn Paper Mask’ thumbnail to make a selection.
Step 19 - Create a ‘New Layer’ by clicking on the small button at the bottom of the ‘Layers Panel’ -- it should be on top of the ‘Top Image’ layer and under the top ‘Torn Paper’ layer.
Step 20 - Fill it with Black or ‘Foreground’ Color (Alt/Option + Delete).
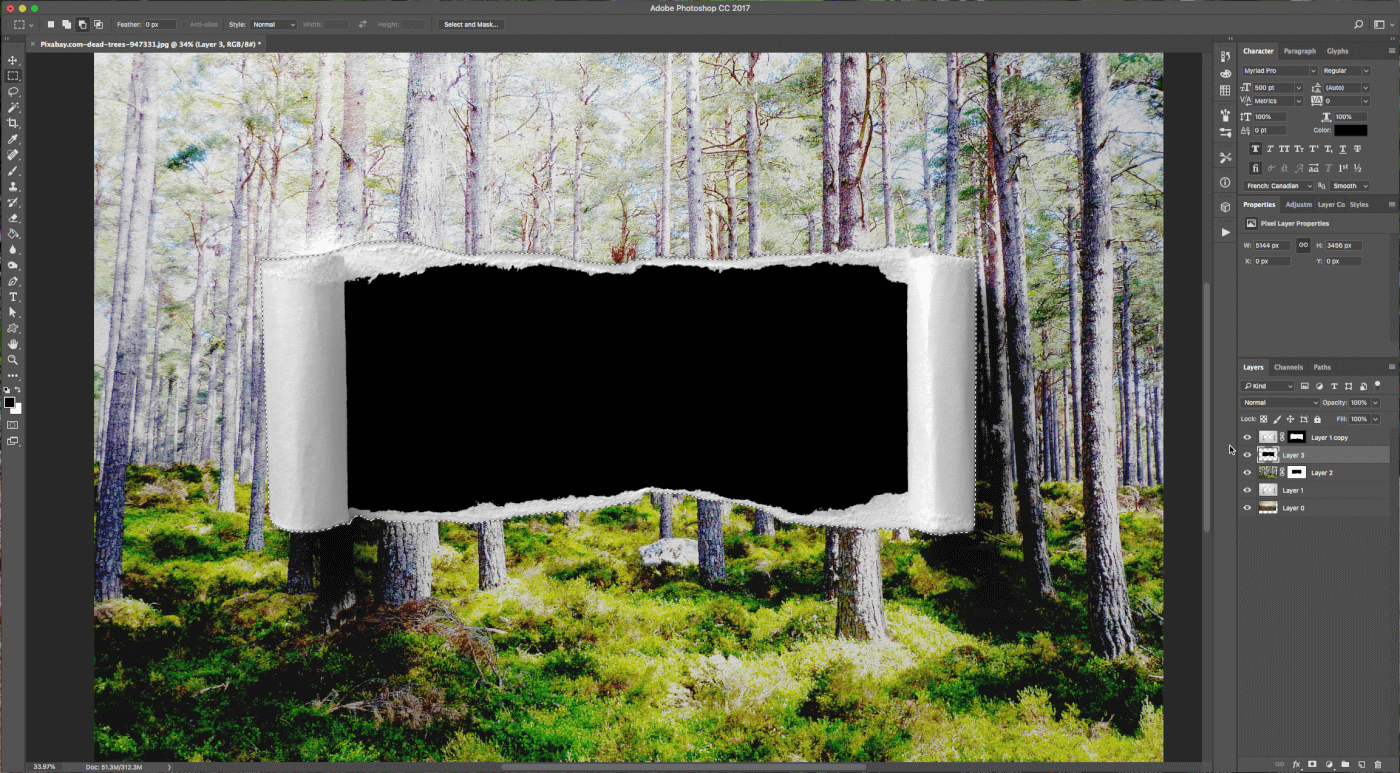
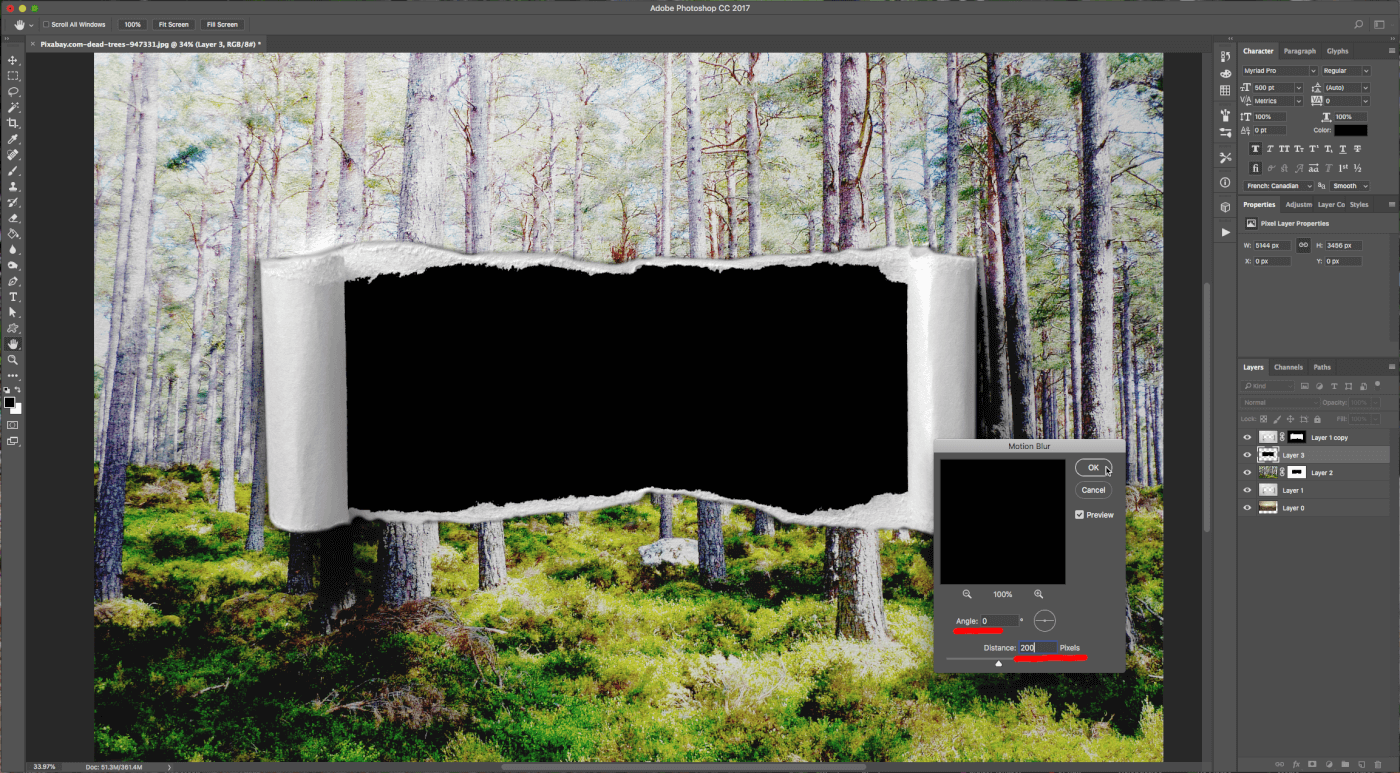
Step 21 - Deselect (Command/Control + D) and go to Filter > Blur > Motion Blur…
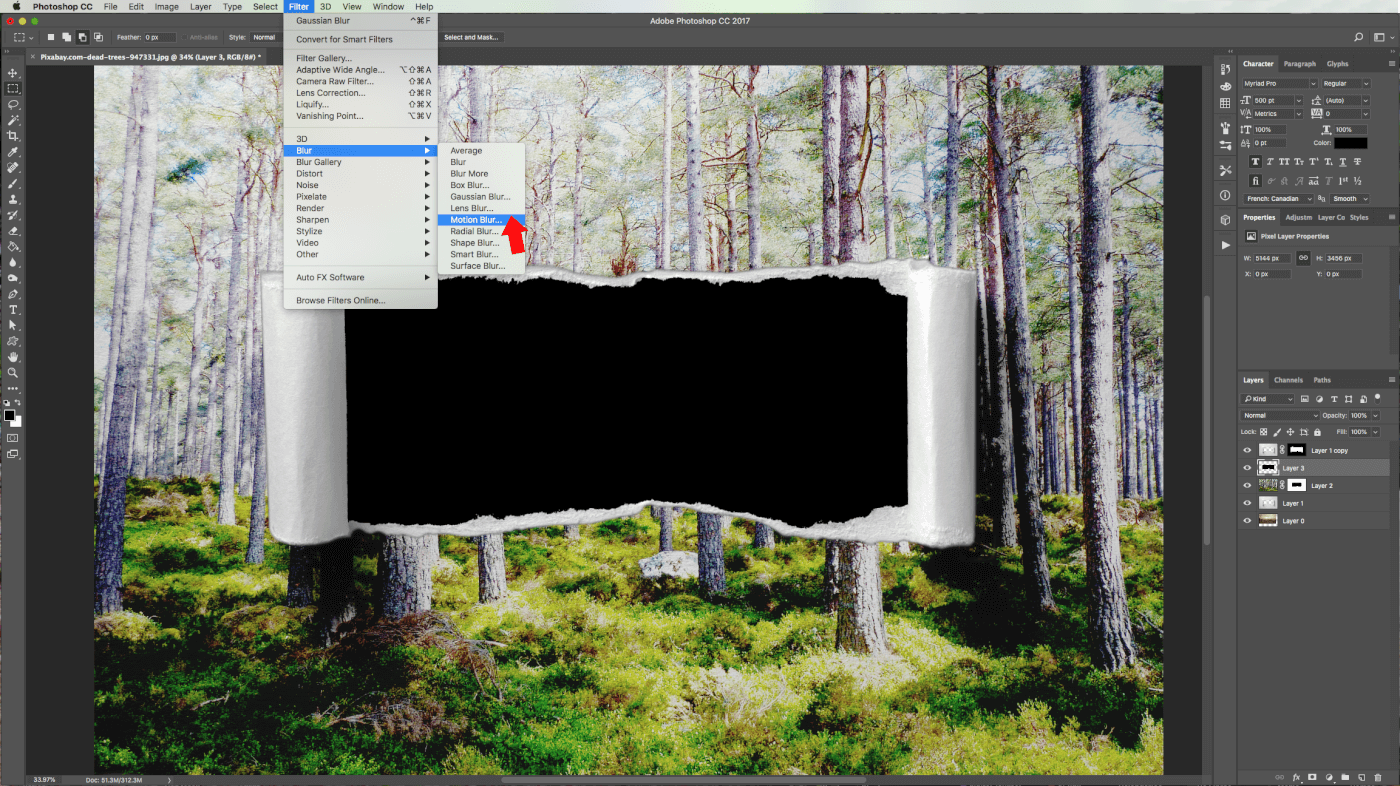
Step 22 - Use a 0° Angle and a ‘Distance’ of 200 Pixels.
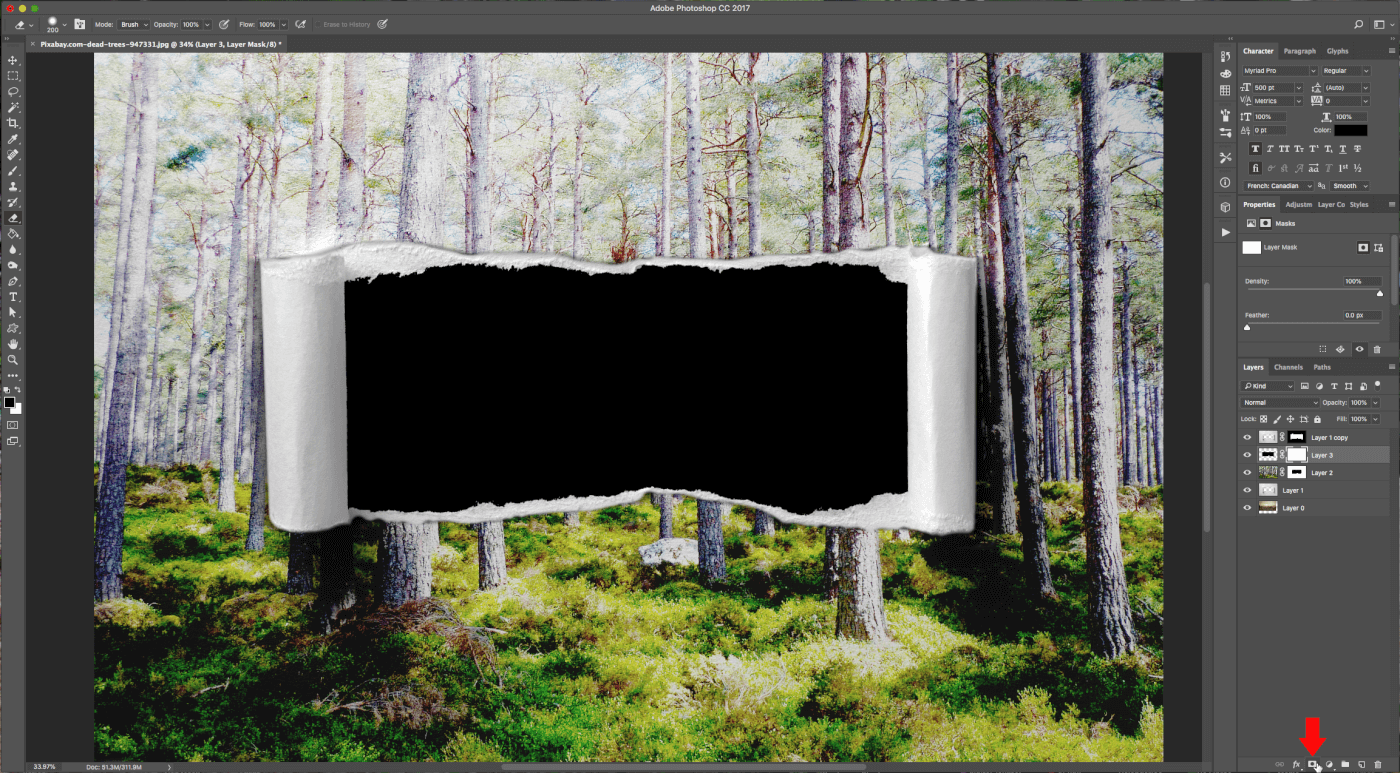
Step 23 - Create a ‘Layer Mask’ by clicking on the small button at the bottom of the ‘Layers Panel.’
Step 24 - Use a large and soft brush (380 px, 0% ‘Hardness’) and Black as ‘Foreground’ color to erase the hole’s insides and the top and bottom edges.
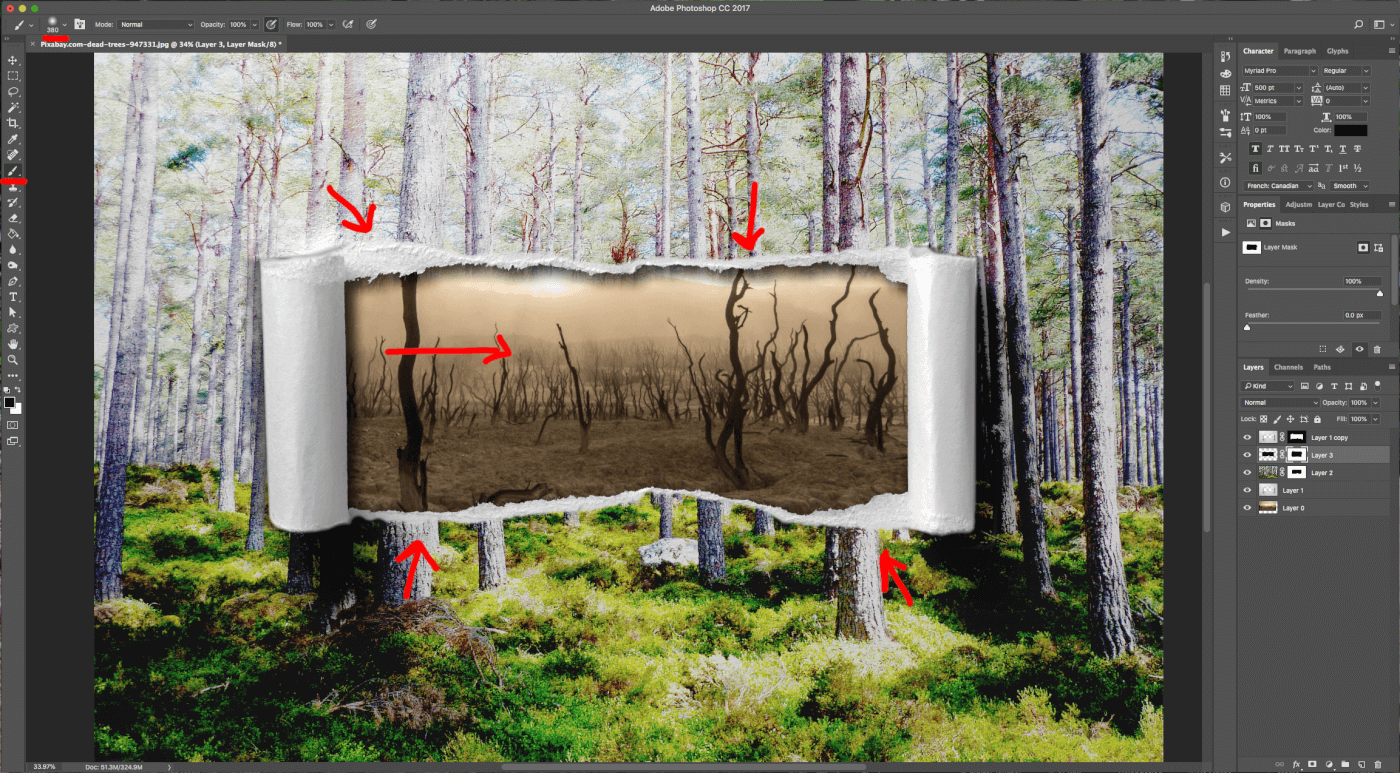
The idea is to leave the shadows where the portions of torn paper overlap with the surface. Here’s what your design should look like so far.
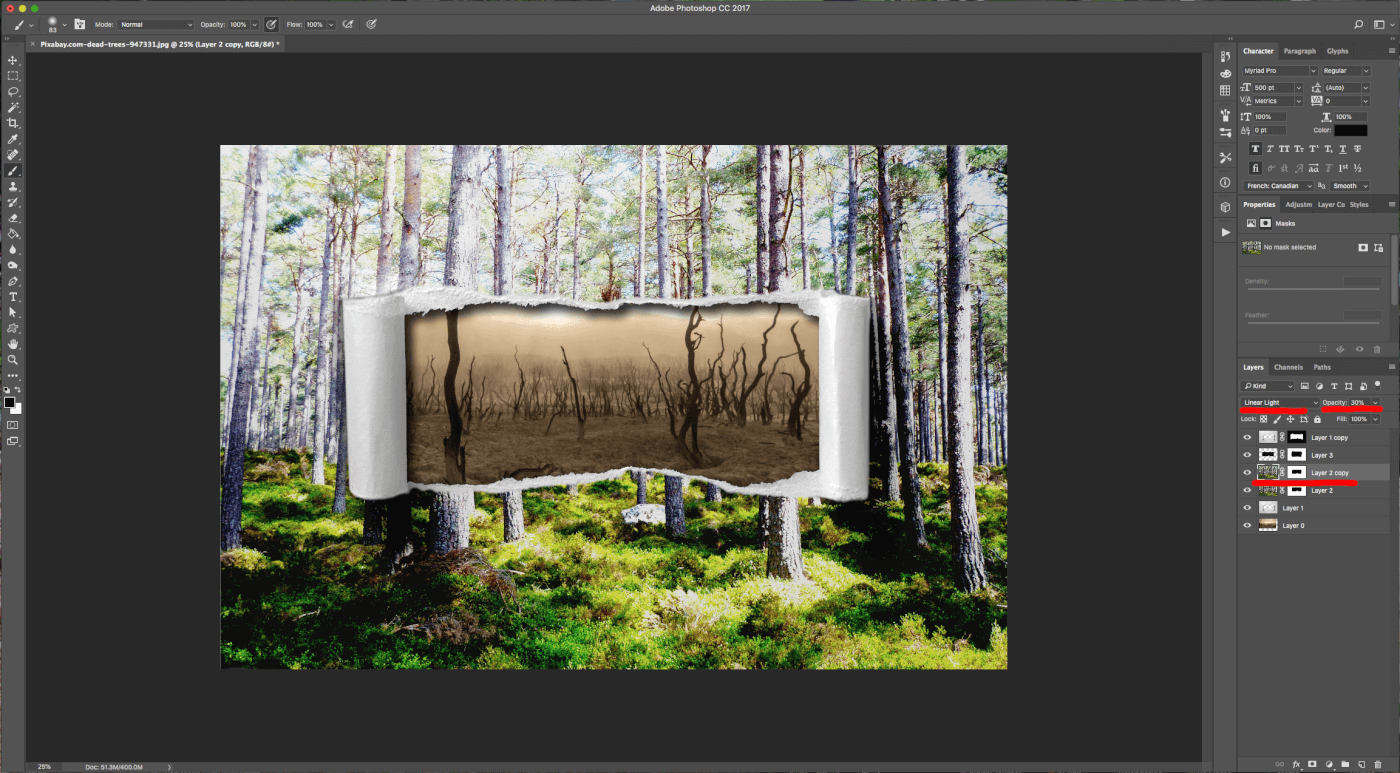
Step 25 - Duplicate the ‘Top Image’ Layer and change the ‘Blending Mode’ to ‘Linear Light’ and the ‘Opacity’ to 30%.
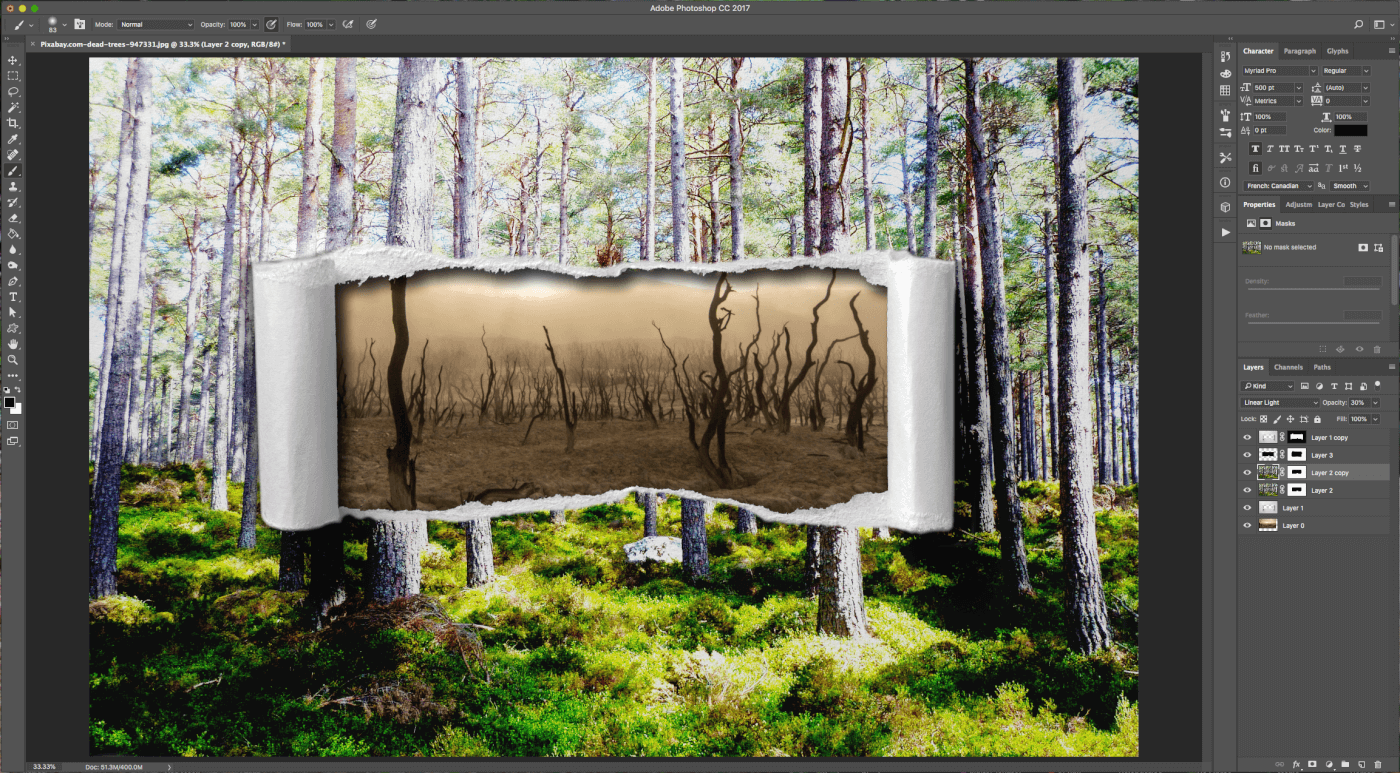
Step 27 - To finish, check out your work to find any areas you need to improve by revisiting previous actions or experiment with finding new additions to the torn image overlap.
0 downloads available to unregistered users! Create a free account to get this and explore thousands more files. Already have an account? Log In